Tuesday, September 28, 2010

Four Corners & Colorado Plateau series - #4 & 5

I had planned to post these yesterday, but by the time I finished painting for the day, it was too dark to take photos [I usually take them outside].

The first is of a wash - one of many that run through the plateau country.  Most are dry except right after a rain; this had a few residual pools of water, which were no doubt gone within the next day or so.  They follow the path of least resistance, usually bordered by sandstone outcroppings and cliffs, as shown here.

Along the wash  - #4
5x7 
oil on gessoed card

It's been good practice to mix up a variety of greens for the grasses, shrubs and trees.   The clouds for this were based on what was out my window at the time, so it's got a touch of plein air.  

Outcropping  - #5
5x7
oil on gessoed card

Jurassic period Navajo sandstone is the predominate rock along Hwy 160 as you cross into AZ.  It forms both cliffs (as in Lake Powell) and scalloped cross-bedded slopes - a testament to its eolian (dune) origins.  Grasses and other hardy desert shrubs take hold along the eroded debris piles and in the fissures.  


Monday, September 27, 2010

Four Corners & Colorado Plateau series - #2 & 3

Two more done today for this series.   My plan is to keep all of these as alla prima pieces and not re-work any, lest I get bogged down in trying to fix mistakes; it's best just to recognize the issues and try to avoid them in the next painting.   I'm also not overly concerning myself with composition issues at the moment; I'm choosing photos where the composition is interesting enough to me to warrant painting it.

I actually completed 4 paintings today, including a larger one on canvas paper of Church Rock, and a still life of sorts.  It was fun, so I will probably mix up the landscapes with other subjects and post them as groups.

For now, here are the next two.  Clouds for both are from memory and rather spontaneously painted, which is probably quite obvious.

Cottonwood View  - #2
5x7 inches
oil on gessoed card

Cottonwoods against weathered Navajo sandstone rock indicate the presence of water in this arid climate.  I'm sort of starting to figure out the best sequence to add the various elements and not turn everything into an overblended mess.  

Towards the Rise - #3
5x7 inches
oil on gessoed card

Heading west along Hwy 160, the road takes many curves and undulations through washes and over small elevations on the plateau.  Need to work on the cloud placement for sure.   Those yellow highway marks are a challenge to get right, and mistakes aren't easily corrected.  Better luck next time on that.  


Sunday, September 26, 2010

Go take a Hike: Crater Lake trail

No painting today, so instead I'll share a selection of the photos taken from today's hike, which is what I did instead of stay inside.  We try to do long day hikes on Saturdays or Sundays, as long as the weather holds up.  Today was another perfect fall day:  temps in the 70's, even at 11,000', and a bright, sunny day.  The aspen are continuing to put on a glorious display for everyone driving up Hwy 550.

Crater lake is an alpine level lake located at the base of North Twilight Peak in the San Juans.  The trail starts at Andrews Lake, right off Hwy 550, about 10 miles south of Silverton.  Last summer when we were  visiting Durango, we started this hike, which is 5.5 mi. to the lake.  Living at sea level and being out of shape made even hiking less than two miles along the trail seem like a grind.  It starts around 10,000' and only gains about 800' during its course to the lake.  Here is a photo I posted earlier taken on the same trail last summer.

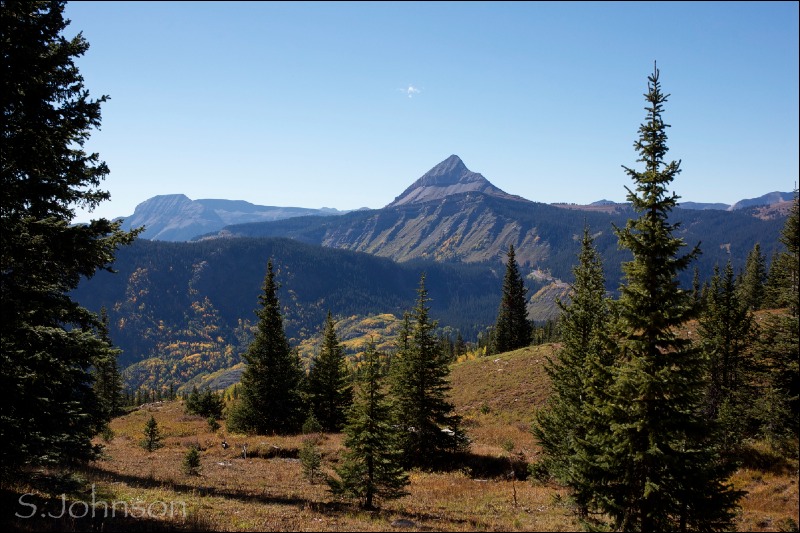
North Twilight Peak, as seen from Hwy 550 on the drive ~1 mile from the turn-off to Andrews Lake.  Fresh snow is visible on the north face after a storm we had 2 days ago, and look at those aspen in their full-on-disco fall color!

Afternoon light usually results in really washed-out photos, but we seldom get to the trails this far up the highway before about 11 a.m. (it's about an hour drive from Durango).  Having no clouds doesn't help that, but what are you gonna do?  Answer:  make the best of it!


Aspen stand with rock outcroppings on hillside.  In general, aspen don't grow above about 9,000', and these were one of two stands anywhere near the trail.  

Gray limestone and pink/tan sandstone are the rocks seen from bottom to top here.


Engineer Peak, again.  Yes, it's true:  I have a fixation with this mountain.  I am quite sure I'm not the only one living in the area who does; it's just that cool.

It manages to look good even in midday sun.  As we approach the forested section of the trail, it disappears from view for a bit, only to reemerge from a different vantage point, as we'll see below.


Trail, in shadow.  Through a forested section the trail goes, shortly after entering the Weimenuch Wilderness.  Wilderness = an area untrammeled by man and where man does not remain.

A bit later, I passed a group on horseback with 2 pack mules.  They were heading home after a successful elk hunt.  It's bowhunting season here, so anyone who can bag a bull elk with a bow clearly has some excellent hunting and archery skills.  I was impressed.

Elk generally remain in the high country throughout spring, summer and fall, and are seldom, if ever, seen during the day.  In the winter and at dusk, they descend from the mountains into the open meadows in search of food.  I'm confident I'll be seeing plenty of them this winter.


Twilight Mountain, as seen en route.  Out of the forest and into a meadow of golden-brown fall grasses with a smattering of fir.

This about half way to Crater Lake - just under 3 miles.


One of the "money shots" of Engineer, showing a view you'll not see without some work.  Stands of aspen continue to delight hikers' aesthetics as they form patchworks of color along the contours of the terrain below.


Crater Lake.  Sparkles from the sun dance off the surface as a slight breeze hits the surface.  Residual snow resists immediate melting in the shadows and along the steep slopes.  A few large skimmer-type dragonflies were patroling the shoreline in search of food.

Reeds at the water's edge are also fading to their fall colors.


Crater lake pano
Sit and have lunch, and enjoy the peace and quiet.  A handful of other hikers were scattered along the shore, also enjoying a beautiful autumn day.

A bold visitor.  This chap apparently is quite used to human presence, and given his proximity, we figured he probably is either casing for food opportunities or perhaps defending his territory.  This almost looks like a telephoto shot, but it's only 70mm - that's how close he was.
Engineer on the way back.   Look how the light changes as compared to the above photo.  

Like I said, it's just that cool, and looks good from all angles.


Symmetry and form in the rocks.

On the way back, and waiting for Wayne to catch up, I decided to go have a closer look at the rock outcropping in the meadow about 2 mi. from the trailhead.  It's composed of Leadville limestone, a Mississippian-period rock formed from widespread seas that existed 320 million years ago.  

And, it has fossils!  Click on the photo to see the perfect star-shaped center of these remarkable examples of early marine life forms.  

Paleozoic bas-relief with moss.

I could have spent hours crawling around on these rocks, taking photos and just delighting in the patterns and shapes of these fossils.  

They don't look like the crinoids I've seen in the analogous limestone (Redwall) in the Grand Canyon.  Regardless, they are beyond awesome.


Andrews Lake - late afternoon.  

Back at the trailhead, I had a few minutes to take some final photos of Andrews Lake, this time in better light.  

The photos I took at the start of the hike were so poor they weren't worth keeping.  This one does a bit more justice to the lake, thanks to lower level light.


Friday, September 24, 2010

A new series and a new medium

It's finally time to shake things up in the studio a bit.  I've been working exclusively in soft pastels for the past year (almost), and while that has been great and I don't plan to abandon them, I am feeling the urge to return to oils.

I say "return", because for over 12 years, I worked exclusively in oils...but never on 2D canvas, and never a single landscape, still life or portrait.  The "canvases" were polyresin equine sculptures and the method of painting was decidedly different than the direction I want to go now.   It would often take me weeks to complete a single piece, done in multiple thin layers and glazes, with much attention given to minute detail and careful blending and color matching for real equine coat colors and patterns.   Brush strokes or any kind of impasto technique was absolutely, positively not acceptable, nor was loose, impressionist-type work; it was all about photorealism.   That was good for many years, but eventually I got burned out and desperately needed a break.

So, while I feel comfortable working with oils, it is somewhat limited in scope:  no alla prima painting, no juicy.   Over the past several years, I've accumulated many oil painting technique books, with a focus on landscapes.  I've managed to replace almost all that were lost by the PO this past spring, and I've been re-reading them.  I follow many landscape painter blogs and almost always have books by contemporary or deceased master artists I get from the library.  I'm inspired by the works of O'Keeffe, Hopper, Maynard Dixon, Edgar Payne, and contemporary landscape painters Ed Mell, Matt Smith and Clyde Aspevig.

Our trip to the north rim of the Grand Canyon, across a good slice of the Colorado Plateau, was the inspiration for a new series of paintings, based on the photos taken during the drive along Hwy's 160, 89 and 64, and of course, the Canyon itself.

Here's the piece that kicked it off - my very first landscape painting in oils:

West from North Timp Pt
5x7 inches
oil on gessoed cardstock

Perhaps not the recommended subject matter for a first painting in oils, but it worked for me.  Reason:  it's a subject matter I'm very well-aquainted with, and thanks to haze and time of day, what would normally be an overwhelming degree of detail had been rendered to a series of horizons in simple shapes and a simple palette.  What better way to work than as a value study devoid of distracting detail?  Plus, it follows the tenets of atmospheric perspective.

I probably fussed over it too much, and it was clear that I need to overcome my resistance to loading the brush with paint, but it was somewhat exhilarating.  I ended up doing it in two sessions, as I needed to correct some values and the paint was just too thin.  

For those familiar with the Grand Canyon, you'll instantly recognize this topography is not in the main part of the park:  those wide benches are known as the Esplanade, which is the thickest layer of the Supai group of sandstones and mudstones, and it trends thicker and towards forming these slickrock extensions as you head west.  The reddish cliff layer visible in the lower left section is the Redwall limestone, so named from the stained appearance from the 4 Supai group layers above it.  

I used a simple palette of burnt umber, ultramarine blue, burnt sienna, yellow ochre and titanium white.   BU + UB makes a glorious chromatic blue-black - perfect for those receding horizons.  

Anyway, my goal is to do 2-3 of these small studies per day, working my way across the Colorado Plateau.  I figure by the time I work back to the Mesa Verde area, I should be much more proficient!  And probably pretty close to 100 paintings as well.

Here is the first in the Four Corners & Colorado Plateau road trip series (or, second, I suppose):

Road to Red Mesa
5x7 inches
oil on gessoed cardstock

Alla prima - added cadmium yellow and A. crimson to the palette for this piece.  Red Mesa is past Four Corners and on the Navajo Nation, as is all of Hwy 160 as soon as it enters AZ.  I had issues with the paint thickening, possibly because the oil was leaching into the palette board I was using, so I may add some walnut oil for future paintings so the paint is less tacky.  I'm used to using Liquin for a drying/glazing medium, and may use it in the future.   

The cardstock, which I made from existing white archival matboard pieces cut to size and coated with 2-3 layers of acrylic gesso, works okay, but I may switch to small canvas boards in the future.  These are nice because they are excellent to practice on, but if a piece turns out well, it can be framed.

I'll keep tossing pastels into the  mix, probably as pieces for this series, and maybe some random other pieces as well.  For now, though, it's onward along Hwy 160 towards the Grand Canyon!


Thursday, September 23, 2010

More fall colors in pastel

Just finished, and another based on a photo taken on our hike 2 days ago.  This looks to the north, as the trail crosses an open meadow in the valley.  A still-green stand of cottonwoods on the left lead to Coal Bank Hill and Potato Mtn. to the right - a cloud-cast shadow on its lower slope.  A stand of yellow aspen defines the northern boundary of this attractive meadow, which still has a surprising number of wildflowers.

Along purgatory flats
7.5 x 11 inches
320# sandpaper on matboard

It's always nice to return to sanded papers after working on a low-textured paper like Strathmore.  This piece was done almost entirely with Nupastels, with my favorite dark green Sennelier and some others for the sky.  No finger blending at all here; just layering and scumbling.  

A few more photos from that same hike:


"Late arrivals"
An unknown species of butterfly feeds on a late-season daisy in the meadow

"Not all is golden"
This backlit sumac (I think) branch shows off its brilliant orange leaves against the forest of aspen


Wednesday, September 22, 2010

Fall comes to the San Juans

Back when I lived in AZ, I always loved the fall.  In the desert, it meant a break from the hot temperatures and resuming outdoor activities, like backpacking in the Grand Canyon.  In the higher country, the mornings are crisp, the air is dry and there is a distinct change in the quality of the light.  And, of course, fall colors.   In the west and southwest, that means patches of broadleaf deciduous trees interspersed with conifer forests, and coupled with the mountains, canyons and plateaus of the region.   Greens fade to yellows, rusts and brown as the grasses and wildflowers fade away and go to seed.  The whole land has a warm, inviting glow to it.

People rave about "fall colors" in the east coast, particularly in New England.  They are hit or miss, I found, and the season is short - about 2 1/2 weeks.  One good wind or rain storm, and it's over sooner.  Once the leaves are gone, the forests are completely barren and lifeless for the next 6 months.  I found that depressing, and never looked forward to fall.

Now that I'm back home, the excitement over fall has returned.   Everyone waits for the aspen to turn, and turning they are!  Yesterday, we hiked the trail that we did the day after we got into town:  the Purgatory Creek trail.  It goes through several stands of aspen, and we hoped that we'd see some of them in full color.  We weren't disappointed.  The trail starts across from the Durango Mtn. Resort (formerly known as Purgatory Ski Resort), follows the creek down the mountain and onto a valley where Cascade creek runs.  The views of several mountains are spectacular.  

I'd originally planned on doing another series of landscape paintings, focusing on oils, but I couldn't resist doing another small pastel today, based on one of the photos I took along the trail yesterday.  Another piece is on my easel, probably finished up tomorrow.  This is a good way to include some photos from the hike without a separate post, so below are some of my favorites.

"aspen trail"
7x5 inches
Strathmore paper on foamboard

It was just great to pull out the high-key yellows for this painting.  The sky looks a bit flat in the photo; we had overcast skies and rain all day, so the actual painting looks better in person (don't they always, though?).   

"Aspen curves"
A tall aspen with a graceful, curving trunk, is flanked by smaller trees and evergreens on the trail


"West Needles in Shadow"
This view to the east along a rock outcropping shows the patches of aspen, both yellow and green, amongst the fir and spruce forest on the West Needle Mtns.


"Engineer & Aspen"
Engineer Peak is visible to the northwest in this view from the Purgatory Flats river valley


"Cascade Creek"
Just under two miles from the trailhead, the trail approaches this perennial creek, which attracts fly-fishers as well as hikers and backpackers


"Color Study"
These stands of aspen show off their range of colors in this abstracted image, shot at 70mm

"An Intimate View"
A small branch of aspen leaves, backlit by the afternoon sun, shows color detail and shadows, in contrast to the bokeh of the distal trees and sky


Tuesday, September 21, 2010

Two small landscapes: East & West

Resuming the landscape theme here, with two small pastels that were another experiment of sorts.  I wanted to see how it would work to dry mount some Strathmore paper on foamboard, both as a painting surface and just for ease of handling (and, more importantly, framing).  I see lots of pastelists talk about painting on paper mounted to Gatorfoam, archival matboard, or other rigid backings.  But, no one explains techniques or materials they use.

I've experimented with the 3M photomount spray, which was messy, toxic-smelling, and didn't seem to work all that well.  I've used the double-sided tape that scrapbookers use, and while it wasn't messy, it wasn't terribly efficient, especially for larger sized pieces.  And, I've never used it with pastel papers - only sandpaper and only on matboard, not foamboard.

I came across a glue stick (Elmer's, I believe) in the scrapbooking section of the store a few weeks ago, and it looked like something worth trying.  Permanent adhesion, acid-free (important; I've had drawings from college ruined from using rubber cement) and in a stick form, so not messy and probably wouldn't buckle the paper.

Using some of the strips remaining after trimming the Strathmore papers to 12x12" and some acid-free foamboard pieces, I decided to give it a try and make some 5x7" panels.   I have a Logan matboard cutter, which is extremely handy for getting a nice straight edge on foamboard.    

I found that a good technique was to draw a line on the wrong side of the paper, apply the glue past it, and then carefully line up one corner edge to the foamboard.  Starting in the center and pressing out seemed to be effective at removing/preventing bubbles, at least in the 3 samples I tried.  Then, after it had dried for a minute, I carefully measured the two remaining edges and cut them with a small hand-held Xacto blade.

The glue, which was in a dry stick form to begin with, dried without darkening or warping the paper, and assuming I got it past the edges, has kept the paper from lifting.  It was easy, not messy and had no odor.  So, I'll be using that for any paper mounting to backing surfaces from now on, and with any photos I mat as well.  

Anyway, here are the two paintings.  They were done quickly; I tried to keep things loose.  The first is based on a photo taken in northern NM a few weeks ago; the cloud is actually in CO.  I simplified the scene by removing a bridge and other undesirable elements that were in the photo.  Just a line of trees, some brief foreground, and the sandstone mesas to anchor the cumulonimbus.   

The second is a farm in PA, from a photo taken on our move drive.  I was drawn to the simple shapes of the treeline and the way the golden grass/grain splits the cornfields and curves around, almost like a river in a canyon.  

Monsoon Season over the Mesas
5x7 inches
Strathmore paper (blue) on foamboard


Field of Plenty
5x7 inches
Strathmore paper (rust) on foamboard


Related Posts Plugin for WordPress, Blogger...