Wednesday, September 8, 2010

Labor Day trip to north rim of GCNP- Part I: getting there

One of the most joyous things about returning back in the southwest is once again being close to the canyon country of the Colorado Plateau.  I love the mountains of the San Juans here in Durango, but the canyons and landscape of northern AZ and southern Utah are truly where my heart and soul belong.   To my eye, it is the most beautiful and fascinating landscape in this country, if not the world.  The earth's skin is exposed, not covered by endless forests or oceans or pavement or malls, and able to be experienced in all its glory.

Rock layers formed over hundreds of millions of years from shallow seas, mudflats, and sweeping sand dunes, long before mammals (let alone humans) were even a blip on the evolutionary map.  After they were formed, time, water, wind and plate tectonics worked to carve and sculpt the most amazing forms out of the earth.  And, wherever you go within the geologic province known as the Colorado Plateau, there will always be something different and uniquely beautiful to see.

During the eight years I lived in Flagstaff and Prescott, I made countless trips to my favorite destination:  the Grand Canyon.  I hiked, ran and backpacked along the many trails and routes found within its depths, and never once did the novelty wear off; in fact, the more I was there, the more I *wanted* to return and immerse myself within it.   It remains, and will always remain my favorite place on this earth to be.   During the time I lived in CT, I was terribly homesick for this landscape.

So, when Flagstaff friends Dave and Eva sent out an Evite for a Labor Day car camping trip to the north rim of the Grand Canyon, it didn't take long for Wayne and I to agree come!

The drive from Durango to the Grand Canyon is without a doubt one of my all time favorites.   It's what road trips are all about.   For closet geologists like myself, it's a never-ending, always changing wonder of the earth's beauty.  It goes through a good portion of the Navajo Nation as well, which means never worrying about large, ugly tracts of cities or suburbia or, for that matter, much human influence at all.  Most of the ugly is confined to the perfunctory HUD prefab junk homes or run-down single-wide trailers so 'graciously' provided to the Navajo by the "ever-so-generous" federal government, in small, scattered pockets throughout the reservation.  An occasional hogan made from local materials is a comforting reminder that not all native culture has been completely squeezed out of the area.

I have decided to spit this into two separate blog posts.  I took over 400 photos during the trip, most of the drive itself, because it was just amazing.  So, it needs its own post, as does the Canyon.  I hope you enjoy the trip through this photo essay, and perhaps can understand why I love this country so much.

Church Rock and Comb Ridge pano
Church Rock is one of the many volcanic necks, or diatremes, in the area.  These form when lava and gases erupt through a weak point in the earth's crust.  Shiprock, in northern NM,  is another, larger example.  Comb Ridge is an example of a monocline, or one-sided tilted fold, in the earth.  Click on the photo to see the uplifted rock of Comb Ridge, formed from Jurassic period Navajo sandstone.  It looks small in the photo, but each of those notched uplifts of rock are probably over 200 feet high.

These unusually eroded forms of Entrada sandstone are known as the "Baby Rocks", and are at the base of Baby Rocks Mesa, on the south side of Hwy 160.  This photo was actually taken on the way home when I could shoot through an open window.
Whimsical formations like these, found commonly throughout the CP region, are also generically known as "hoodoos". 


Hwy 160 towards Kayenta.   Black Mesa, seen to the left, is formed of Cretaceous period deposits, ranging from sandstone to shale and the flammable rock known as coal.  To the right, Organ rock monocline, is visible as large pink arcs of rock.  The town of Kayenta is to the right and barely visible.  Monument Valley is also to the right, approximately 22 miles to the north.


Close-up of Organ Rock monocline
.  Composed of Navajo sandstone, as it abuts the Shonto platform to the north.  Navajo sandstone is the principal rock that forms the dramatic cliffs present in Glen Canyon/Lake Powell.  It is also prone to forming natural arches, and suggestions of arch formation can even be seen in this photo.
Painted Desert along Hwy 89.  
Ten miles past Tuba City, Hwy 160 terminates into Hwy 89.  We are now headed north, and this view is to the east.     These colorful rocks, known as the Chinle formation, formed from Triassic-period mudstones deposited over 200 million years ago, and are what make up the Painted Desert region of northern AZ.  The rock is soft and easily eroded; often, a small harder cap of rock is all that keeps it from eroding into the surrounding alluvial deposits.
                                                                                       
Echo Cliffs along Hwy 89.  The Echo Cliff monocline is to the east side of the highway, running over 30 miles and across the UT border.  It is formed from the Glen Canyon group of Navajo sandstone (top layer), Kayenta formation and Wingate sandstone.    These cliffs apparently got their name from a member of the second Powell expedition, after hearing his voice echo after.  Marble Canyon and the Colorado River are to the left/west a few miles.  


Vermillion Cliffs towards Marble Canyon.  This is the view right before the road drops and heads over the bridge crossing the Colorado river and near Lee's Ferry.  Lee's Ferry is named after a Mormon, John D. Lee, who was made a scapegoat for the infamous Mountain Meadow Massacre, where almost 150 settlers headed from Missouri to CA were killed by Mormon zealots under the leadership of Brigham Young.  It is now a popular fishing area and put-in location for all boat trips through the Grand Canyon.


 Monocline meets Plateau.  More enigmatic geology.  To the right, we have the Vermillion Cliffs, which form the southern border of the Paria plateau, made of up of Chinle and Moenkopi formations (both Triassic).  To the left is the beginning of the East Kaibab Monocline.  Its surface rock is Kaibab limestone (or formation), a Permian-period rock of 245 million years.  This is the rock you stand on at the edge of the Grand Canyon.  All the younger Triassic rock, deposited over millions of years, has eroded away.  How?  Why?  Now, a small rift valley separates the two, filled with alluvial deposits of rock, old and new.


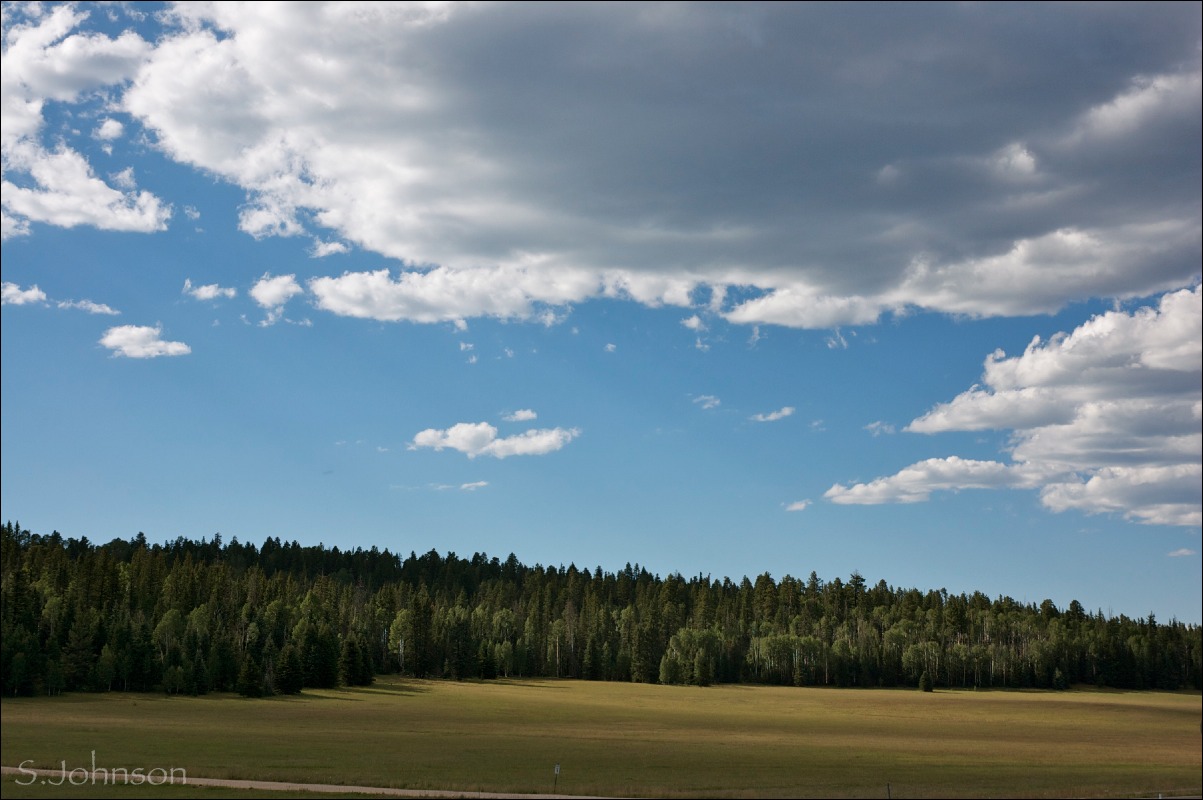
 On the Kaibab Plateau.  After leaving House Rock Valley (shown above), Hwy 89 winds up the monocline through pinon-juniper to Ponderosa pine on top of what now becomes the Kaibab Plateau.  At Jacob Lake, Hwy 67 now heads due south and towards the rim.  It continues to climb in elevation, and soon the predominate trees become aspen, fir and spruce.  The road soon opens into a long meadow.  Unlike the east coast, where essentially all meadows and fields are man-made, these meadows are natural.  Filled with grasses, wildflowers and occasional outcroppings of rock, they add to the scenic drive towards the rim.


Along FSR 22.   This shot was actually taken the morning we left, but I include it here as it shows the roads taken to arrive at our final destination on the north rim:  Timp Point.

Aspen and ponderosa pine make up most of the forest along the FS roads, as shown in this photo.    On the north rim, many locations at the rim itself are on FS land vs. NPS.  Camping is at-large and there are no fees to camp (but no facilities, either).  It also means no crowds...and that is one of the things that makes the north rim so special.

Next post:  Three days at the north rim.


Saturday, September 4, 2010

Go Take a Hike: CT from Little Molas lake

Colorado is the state for people who like to be outdoors.  Not only is the scenery spectacular wherever you go, but trails are everywhere.  And not the sad excuses for "trails" that continually disappointed me in CT, where they cross roads, playgrounds and pass right up against people's backyards, where traffic sounds and other human-caused noise were never far away and having to be concerned about loose dogs from someone's adjacent property chasing you was always an issue.  Plus, there was never a "destination" - it was just hiking through the same deciduous forests along trails with no view, to some other point that essentially looked the same.

Not so here in CO.  This state takes its recreational responsibilities seriously, as well as the importance of preserving land as "wilderness areas".  For those not familiar with what a wilderness area designation, it means:  1) no human development (buildings, roads, etc.);  2) no vehicles of any kind, including bicycles.  Hikers, equestrians, nordic skiing, snowshoeing - those are all good.  Two long trails traverse a good section of this state:  the Continental Divide trail, which goes from the Mexican to Canadian border across 5 states, and the Colorado Trail (CT), a more modest 500 mile trek going from Durango to Denver.

Plus, there are mountains, so the trails here almost always lead to a view, even if they start out in a pine or fir forest.  Sometimes, it's a bit of work to get to it, but it's always worth it.

Needless to say, after 3 1/2 years e wasted no time getting back into hiking after moving here.   In southwestern CO, the mountain range is the San Juans, which are part of the Rocky Mountains.  However, unlike the front range and northern Rockies, which were formed as a result of plate tectonics that occurred 45-70 million years ago during what is known as the Laramide orogenic event,  the San Juans are primarily volcanic in origin.  This makes for atypical shapes, erosion patterns and colors of the rock, and amazing views, even driving along the state highways.

This series of photos was taken along a section of the CT near Molas Pass, which is about a 45 min. drive north of Durango on Hwy 550, and heading in the direction towards Durango.  Some of these photos were taken with my Olympus p&s camera before I had the 18-70mm for my Nikon, so the limitations of its sensor are apparent by the limited dynamic range (aka "blown out skies").

Trail winding through spruce and fir approximately 1/2 mile from trailhead


A field of colorful fireweed is right off the trail, while a monsoon storm builds to the west.  Wildflowers were abundant on this hike, and included various Aster species (daisies), Western Paintbrush, Pearly Everlasting and other species I couldn't identify.

View back to the east shows Little Molas Lake (the same elevation as the trailhead), and a view of the Grenadier Range of the San Juans.  Despite what the photo shows, the skies were quite dark due to storms forming from the east and west.


The sculpted form of a long-dead tree makes up the foreground for this shot of a peak to the west.  Note the varying colors and forms of the strata that are visible.  


Cumulonimbus over Engineer Peak.  Engineer is one of those landmarks that everyone knows about.  On an earlier trip we made to Durango in '06, we hiked/climbed to within a few hundred feet of its summit (~12,900').

Pano shot of Sultan Mountain (center) and Grand Turk (right).  Not much further up the trail, we opted to turn around due to the impending thunderstorms; getting caught in a storm with lightning above timberline is a Bad Idea.

We ended up hiking about 5 miles, and got back to the car without getting caught in rain.  We drove to Silverton (~8 miles to the north) for some coffee, and that's when it began to rain.  

Friday, September 3, 2010

Sky Friday - cloud panoramas

If you've ever taken a series of photographs and used software to stitch them together into a panorama shot, you know how addicting creating "panos" can be.

Back when I had PS Elements 4.0 on my old PC, I used that pano stitching program, but found it a bit time-consuming and it had major limitations and shortcomings, like a really poor blending tool and frequent error messages about not enough memory to complete the task that seemed to take forever.

I still haven't purchased the latest edition of Elements, but recently started taking some pano series shots for the time when I had the software available again.  Then, on a whim, I decided to do a search for "panorama software, iMac", and read some reviews.

Written by a Danish software engineer (I assume that's his title) called "Double Take" came up as an easy-to-use, stand-alone stitch program.  And, you could download a trial version of it for free.  The registered version is only $24.95, which seemed like a deal if it worked well.  The official site is here, where you can read more, download and/or purchase the program.

Anyhow, I tried it on a set of photos I took a few weeks ago on one our hikes, and was amazed at: 1) how simple it is to use; 2) how well it works.  I'd previously tried Hugin, which is a free Linux-based stitching software, based on a review by Ken Rockwell, but I couldn't get it to do anything, and it was far more complex and confusing than I wanted.  Double Take, on the other hand, is simple yet has features that make it vastly superior to the pano program in Elements.  Even when I do get around to purchasing Elements, I'll keep using Double Take for all panos.

* You open up a new file and literally drag and drop as many photos, one at a time, as you want.  The program automatically matches up each one as you drag it.  You can then re-adjust each if needed.  I found the program did a better job than I did.

* You can then edit each one to adjust for exposure, gamma, saturation, brightness and contrast, and correct the geometry of each, if needed, for rotation, pitch and scale.  You can also select it to crop automatically and lock each stitch into place.

In short, it is great.  I ended up ditching all my previous pano shots made in PS Elements and re-did them in DT, in a fraction of the time, with far better results.

Since then, I've gone on a bender with the pano shots.  Even with my zoom lens that allows for wide-angle shots, I still find that a two-shot pano gives more detail and will allow for a bigger size, should I ever care to print it, than a single wide-angle shot.

So, this Sky Friday features several sky panos.  Locations vary, but most were shot on my deck.  All are two-shot panos.  I should also add that most of these were shot in RAW format, and the program handles that just fine, probably as iPhoto jpeg conversions.

Cumulus congestus afternoon 
August 29, 2010

Stratocumulus sunset
August  30, 2010

Cumulonimbus over Perins Peak
August 25, 2010

Sunset and fading storm
August 25, 2010

Virga over Horse Gulch
August 29, 2010

Altostratus sunset
August 27, 2010

Thursday, September 2, 2010

Colorado Wildflowers #3

A temporary break from the paintings to bring you more of the beautiful wildflowers of Colorado.  It's now late summer, and flower season is just about over.  Petals are shrinking and dropping and the flowers are busy going to seed in preparation for winter.

I was delighted that on every hike we went on, I discovered new flowers I'd not seen before.  It made the hikes that much more special.

Here is a random assortment of some of my favorite images taken in various locations in our area.

CT - Colorado Trail

Scarlet Gila or Fairy Trumpet
These eye-catching flowers are found throughout open forests and dry slopes in the region.  
Location:  Dry Fork Cr. trail.  Early August.

Grass of Parnassus
Found near streams and moist areas, this flower is not too commonly seen.  Location:  CT, near Little Molas lake.  Early August.

Colorado Blue Columbine 
It's not hard to see why this lovely flower is the state flower of CO.  Location:  Engineer trail, late July.  Also seen in late Aug. along the Cross Mtn. trail, at timberline. 

Mountain Gentian
Location:  CT, Molas Lake.  Mid-August.
These flowers are seen at higher elevations (~10,000), and usually in open meadows.  We also saw them on the Cross Mtn. trail @ timberline and along the Ice Lake trail below timberline.

Rosy Paintbrush - two variants
Location:  Cross Mtn. trail, above timberline.  Late August.
Rosy Paintbrush is commonly found above timberline, and due to hybridization, the plants are quite variable in appearance and color of the bracts.  We saw these on almost all hikes when we were above timberline (~11,000).

Elephant Flower
CT, near Little Molas Lake.  Early August.
These delightful flowers are found near streams and other moist areas.  This was along the same small stream as the Grass of Parnassus, pictured above.

Alpine Gentain
Location:  Ice Lake Trail, 12,000'.  Late August.
This is one of the last flowers to bloom on the alpine tundra, and is quite lovely.  It was surrounded by colorful groups of Rosy Paintbrush and some type of Aster that I couldn't identify.

Wednesday, September 1, 2010

Abstracted Cloudscape #5

Here is #5, completed yesterday.  I should title it "Overworked", since it started pushing the envelope of what the paper was capable of dealing with, pastel-wise.  

This one is probably the most surreal and truly abstract of those I've done so far, since it resembles nothing most people associate with clouds.  It's not a commonly seen cloud, and I've never seen on in sunset colors before.  The photo it is based on was taken off my deck during a most fascinating sunset we had last week.   I'll probably post photos at some point.  The clouds you see are known as "mammatus", and are distended pouches seen on the undersides of a cloud.  The name comes from the resemblance to mammary glands.  I've actually seen them several times since being out in CO, usually associated with a cumulonimbus cloud.  These were on the south-facing surface of a large stratocumulus cloud.  No rain, though.  

What happens is as the sun sets, these distended areas are what catch the sun's rays, while the rest of the cloud remains darker.  The curves and shapes of the clouds are made much more visible by the bright light and it produces an eerie and really dramatic effect.  

abstracted cloudscape #5 - mammatus en sunset
pastel on Strathmore 400-series paper
12 x 12 inches

For this piece, I felt it was important to capture the curves of the lightest sections of the clouds, so I applied the pastel in sweeping motions to emphasize this.  There are multiple layers of purples, blues, rusts, and yellows applied, and I had to use lots of finger blending in order to try and achieve the soft transitions seen throughout the clouds.  

I really need to get some good sanded paper to work on, like UArt or Pastelmat, as I think the process would have been a bit less of a struggle.  Nonetheless, I rather like this piece.  It's got purples and oranges, which are two of my favorite colors.

On an unrelated note, we are going to be heading up to the north rim of the Grand Canyon tomorrow for a car camping trip with a few friends over the Labor Day weekend.  I'm hugely excited, as the Canyon is my absolute favorite place on this earth to be.  

I don't know if I'll have time to get another painting finished and posted, but I'm going to try and have several posts scheduled to post Thurs-Mon.  They'll be photos of a variety of subjects that I hope you'll enjoy.


Tuesday, August 31, 2010

Abstracted Cloudscapes - #3 & 4

Here are the next two in the cloudscape series.

Sunsets are, to use the Forrest Gump phrase, like a box of chocolates:  you never know what you're going to get.  Having observed (and photographed) now dozens of sunsets, there are times I figured it was a wash, only to see something spectacular.  Other times, the sky has all the makings for a beautiful sunset, and for reasons pertaining to optics, cloud type, and the cloud's location in the sky relative to the sun, it's a bust.

Having a west-facing deck means that I am privy to sunsets every night of the week.  We've watched as the sun has been increasingly creeping up the side of Smelter Mtn. as the autumnal equinox approaches.

Number Three is based on a photo taken recently of a sunset from our deck;  I cropped the already zoomed image a bit more to render it to two large masses and a smaller mass.  The colors on these sunset clouds are simply amazing - dark purples, blues and reds for the body of the cloud that faces away from the sun.  Along the bottom edge, the longer wavelengths of the sun's visible spectrum of light pass through the cloud vapor, going first from pale yellow to a salmon/pink, to finally intense crimsons and oranges.  Finally, these fade to increasingly darker shades of purple.

Further to the west and thus lower on the horizon, distal clouds await their turn to transition to brilliant colors.

abstracted cloudscape #3 - sunset understudy
pastel on Strathmore 400-series paper (black)
12 x 12 inches
SOLD

It was fun using the high-chroma colors for the lower edges of the clouds here.  I find that there is often a huge discrepancy when I step back from the painting to compare it to the photo.  In this case, the subtle blues and pinks of the mid-section of the middle cloud are probably a bit too blue and too light (at least they are in the photo on my monitor).  And, there's always the issue of the clouds looking stiff, despite my efforts to prevent this.  I tried to keep finger blending to a minimum here, relying primarily on scumbling and layering of colors to try and achieve the effects I wanted.  I think a sanded paper surface would probably work better, allowing for more layering and perhaps less unintentional smudging.


abstracted cloudscape #4 - cirrus, racing
pastel on Strathmore 400-series paper, sanded
12 x 12 inches

The photo that this painting is based on was taken along Hwy 80, between Bisbee and Tombstone, in late winter, and from the window of a car while driving.  The cirrus clouds appeared to have such movement, with long, sweeping fallstreaks and hooked ends.  

For this piece, I think I sanded the surface too aggressively.  The result is that it was almost like painting on a sheet of cloth - the pastel just wouldn't lay down.  This was particularly an issue with the blues I used to do the sky, and it made blending and layering impossible, so that part looks pretty awful.  I decided this would be a good time to  experiment with workable fixative, something I seldom use, to see if I could add up the layers of pastel a bit more.  Didn't work so well.  So, no more of that.  I think the sweeping motion of the clouds themselves is a bit better than in the first cirrus painting, so that's good.   I thought about my former days as a surgical resident, with my attending telling me to hold the scalpel blade lightly - "don't grip it!"  Same goes for holding a pastel - lightly held, it allows for lighter, more gestural strokes.  Some areas of denser clouds towards the bottom called for the pastel to be applied with more pressure, and there are two shades of light gray used in addition to white here.  


Monday, August 30, 2010

Abstracted cloudscapes - #1 & 2

As I mentioned in my last blog post, I decided to try something different for the series of cloudscapes I've decided to do.  I'd planned on posting these yesterday, but the photo of the second was really awful, so I'd planned to re-shoot it today.  It's been raining most of the day today, so instead, I just did some additional pp to it and now it looks much closer to the actual painting.

In considering how I wanted to approach these paintings, I realized that trying to decide on a format (landscape or portrait, and ratio) was a bit inhibiting as far as how I chose what to paint.  So, I solved that issue by going with a square 1:1 format.  In addition to lending a consistency to this series, a square also is ambiguous in its presentation:  it literally doesn't take sides.

I went through hundreds of photos and selected about 20 that offered a variety as far as colors, shapes and overall design features went.  Using a square crop, I chose what I thought was the most interesting composition from each photo.   This lends a very abstracted quality to them, placing them out of the usual context as being connected with the land, and usually, they are just a portion of a cloud.  As of the four I've completed to this point, they are done in a loose but realistic manner as far as colors and form go. 

I'll post them all here as I complete them - probably 2 at a time, since that's how many I've been doing a day - until I'm done, or have otherwise reached some natural conclusion for the series.  

Since this series is really more of an exploration and experiment for me, I'm trying to not get caught up on how well they turn out.  What I've also been doing is post-analysis of each one, to determine what I do and don't like about it, how well things work (surface, palette and blending techniques) or don't work, and what I need to do differently in future paintings.  

I expect I'll learn a lot from these, and perhaps some will be keepers.

abstracted cloudscape #1 - cirrus afternoon
pastel on #320-grit sandpaper
8x8 inches

These are cirrus clouds, a high-level cloud composed of ice crystals.  Cirrus can take many shapes and are usually characterized by long, wispy tails, called "fallstreaks", that are shaped according to the direction of the wind.

The photo this particular painting is based on was taken in the late afternoon, resulting in some warmer colors throughout the clouds - yellows, pale lavender grays, and even a darker reddish-purple in some of the more dense sections of the clouds closer to the horizon.

Cirrus are probably the most graceful of the cloud types, with long, sweeping curves.  In this painting, the movement looks stiff.  Plus, the main cloud is too dense.  I think part of the problem is that I blocked in the blue sky instead of covering pretty much the entire surface of the paper with it, and lightly layering the clouds in on top.  As these clouds seldom have sharp edges, I did a lot of finger blending to blend and soften them.  This also worked well to help define the swirls of the clouds in the lower third of the painting.  


abstracted cloudscape #2 - stormy underside
pastel on Strathmore 400-series paper
12x12 inches

This is a pretty close crop of the underside of a rain-laden cumulus cloud approaching sunset.  The darkest values are un the underside of the cloud, where no direct light is coming.  Slight tonal variations are visible in the forms of blues and purples based on the density of the cloud and the light coming through it.  The middle 1/3 of the painting is a distal layer of the cloud - lighter in value and with a curving shape.  The lighter section superimposed upon it are small "accessory" clouds that often accompany a cumulonimbus.  These are much smaller and thinner, and thus, much more light passes through them.  Finally, the lower edges of the cloud are in oranges and yellows, indicating that it's near sunset.  

I actually really like the palette for this.  I had to dial down the contrast and lighten the shadows significantly on the photo to get it to resemble the actual painting.  Even still, the painting looks far better in person than the photo.  Trying to get the loose, tattered shapes for the small accessory cloud, and layering the colors for the luminescent quality was probably the biggest challenge.  I was partially successful, I think.


Related Posts Plugin for WordPress, Blogger...